敵の一定の範囲内に入るとプレイヤーを追いかけてくるようにします。(敵とプレイヤーの距離が近づくと追いかけてくる)(NavMeshを使います。)
こちらは以下の内容を行ったことを前提として進めます。
プレイヤーとしては以下を使用します。
完成動作
作り方(動画)
作り方(ブログ)
プレイヤーにタグをつける
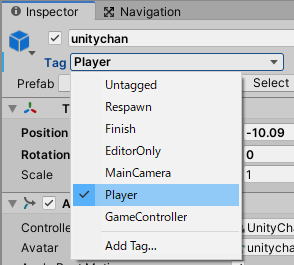
1.プレイヤーのみを対象として敵が追いかけてくるように、プレイヤーに”Player”タグをつける。
Hierarchyウィンドウでプレイヤーのオフジェクトを選択して、InspectorウィンドウのTag欄で”Player”を選択する。
一定の範囲に入ったことを検知するためのColliderを設定する
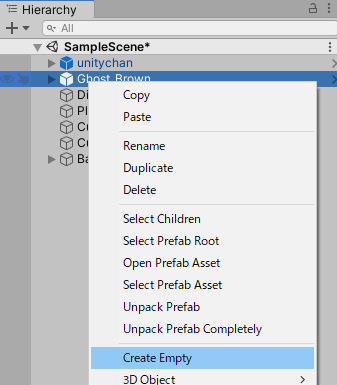
1.Hierarchyウィンドウで敵のオブジェクト上で右クリックをして「Create Empty」を選択して、空の子オブジェクトを作成する。
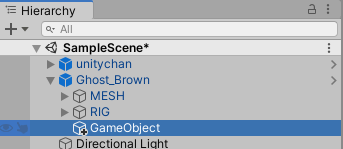
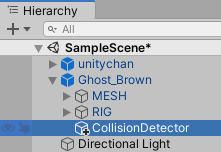
2.空の子オブジェクトの名前を「CollisionDetector」とする
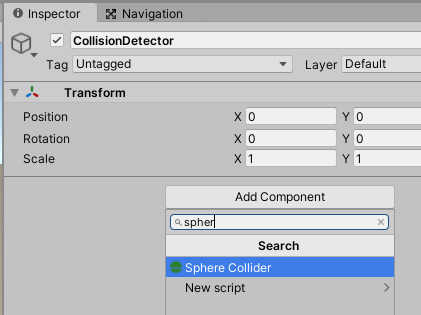
3.CollisionDetectorにSphere Colliderをアタッチする。
HierarchyウィンドウでCollisionDetectorを選択し、InspectorタブでAdd Componentを選択して検索する。
4.”Is Trigger”にチェックを入れる。
※”Is Trigger”にチェックを入れない場合、Collider同士がぶつかると跳ね返り、チェックを入れるとすり抜けるようになる。
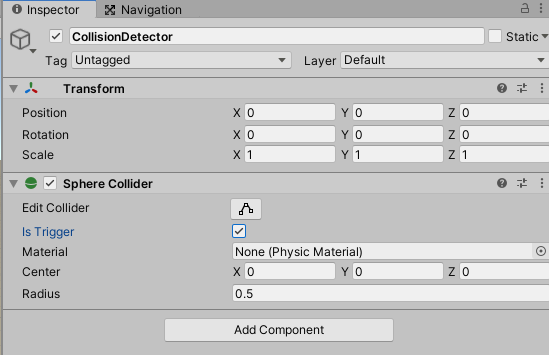
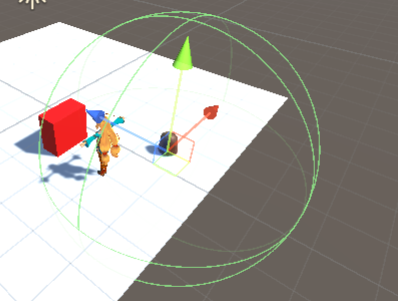
Radias(衝突範囲の大きさ)は適宜変更する。
今回は以下の緑の枠の範囲の大きさにした。
衝突を検知するスクリプトを作成する
CollisionDetector.csという名前でスクリプトファイルを作成し、中身を以下のようにする。
using System;
using UnityEngine;
using UnityEngine.Events;
[RequireComponent(typeof(Collider))]
public class CollisionDetector : MonoBehaviour
{
	// OnTriggerStayイベント時に実行したい関数を登録する変数(引数にColliderを取る)
	[SerializeField]
	private UnityEvent<Collider> onTriggerStayEvent = new UnityEvent<Collider>();
	//  OnTriggerExitイベント時に実行したい関数を登録する変数(引数にColliderを取る)
	[SerializeField]
	private UnityEvent<Collider> onTriggerExitEvent = new UnityEvent<Collider>();
	/// <summary>
	/// Is TriggerがONで他のGameObjectがCollider内にいるときに呼ばれ続ける
	/// </summary>
	/// <param name="other"></param>
	private void OnTriggerStay(Collider other)
	{
		// InspectorタブのonTriggerStayEventで指定された処理を実行する
		onTriggerStayEvent.Invoke(other);
	}
	/// <summary>
	/// Is TriggerがONで他のGameObjectがColliderから出たときに呼ばれる
	/// </summary>
	/// <param name="other"></param>
	private void OnTriggerExit(Collider other)
	{
		// InspectorタブのonTriggerExitEventで指定された処理を実行する
		onTriggerExitEvent.Invoke(other);
	}
}
すでに作成済みのEnemyMove.csスクリプトを以下のようにする。
using System.Collections;
using System.Collections.Generic;
using UnityEngine;
using UnityEngine.AI;
[RequireComponent(typeof(NavMeshAgent))]
public class EnemyMove : MonoBehaviour
{
	private NavMeshAgent navMeshAgent;
	// Start is called before the first frame update
	void Start()
	{
		// このスクリプトを設定したGameObjectのNavMeshAgentコンポーネントを取得
		navMeshAgent = this.gameObject.GetComponent<NavMeshAgent>();
	}
	// CollisionDetectorクラスに作ったonTriggerStayEventにセットする。
	public void OnDetectObject(Collider collider)
	{
		// 検知したオブジェクトに"Player"タグが付いてれば、そのオブジェクトを追いかける
		if (collider.gameObject.tag == "Player")
		{
			// 対象のオブジェクトを追いかける
			navMeshAgent.destination = collider.gameObject.transform.position;
		}
	}
	// CollisionDetectorクラスに作ったonTriggerExitEventにセットする。
	public void OnLoseObject(Collider collider)
	{
		// 検知したオブジェクトに"Player"タグが付いてれば、その場で止まる
		if (collider.gameObject.tag == "Player")
		{
			// その場で止まる(目的地を今の自分自身の場所にすることにより止めている)
			navMeshAgent.destination = this.gameObject.transform.position;
		}
	}
}
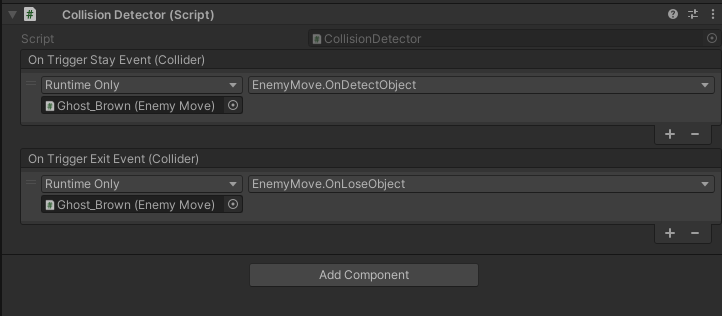
スクリプトを設定する
1.Hierarchyウィンドウで敵の子オブジェクトのCollisionDetectorを選択し、InspectorウィンドウにProjectウィンドウからCollisionDetector.csをアタッチする。
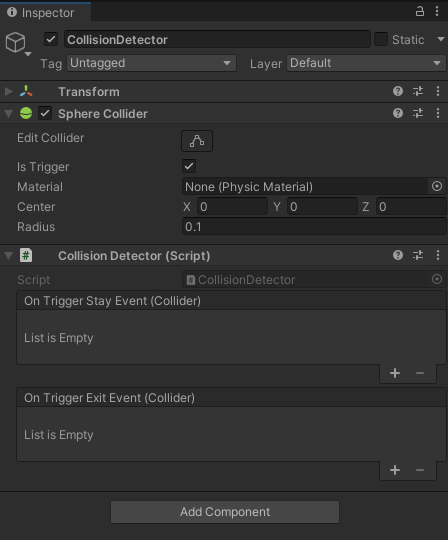
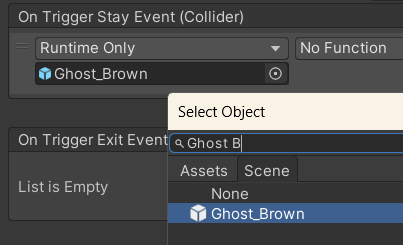
2.On Trigger Stay Eventの右下の”+”を押下する。

3.”None (Object)”の右の”⦿”を押下して、“Scene”タブの”Ghost Brown”を選択
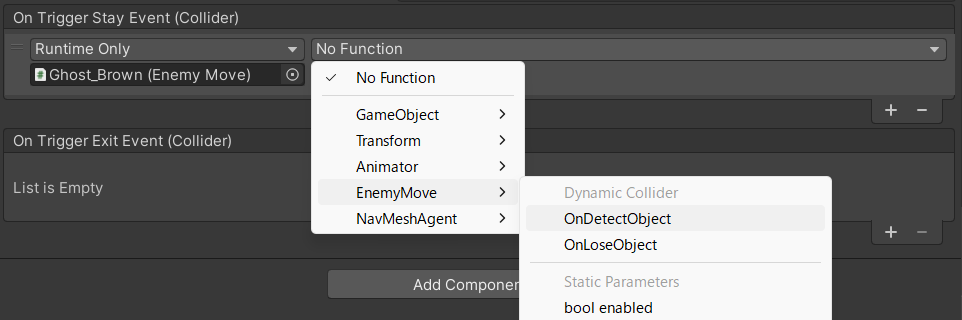
4.右側のプルダウンを以下のように選択してEnemyMoveのOnDetectObjectメソッドを選択する。

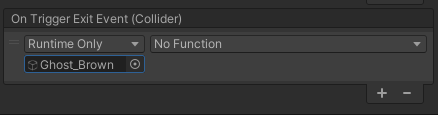
5.同様にして、On Trigger Exit Eventにも設定していく
6.Functionには以下のように選択していって、OnLoseObject()を設定する
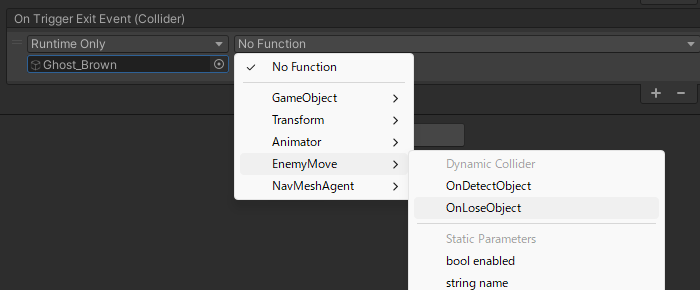

7.最終的には以下
完成
これでプレイヤーが近いと追いかけてきて、一定以上離れると追いかけるのをやめるようになる。
コメント
分かりやすい解説、有り難うございます。
質問があり、コメントさせて頂きました。
上記の「スクリプトを設定する」→「2.On Trigger Stayの右下の…」を実行しようとした際、No Functionのセレクトボックスに「EnemyMove」および「OnDitectObject」が表示されません。
原因が全くわからない状況でございます。
回答いただけると幸いでございます。
コメントありがとうございます。
おそらく以下のどちらかかとおもいます。
1.「スクリプトを設定する」の2と3の項番を追加して、”On Trigger Stay”プロパティの各値の入れ方を細かくしたので、こちらを確認してください。
1がちゃんと設定できている場合は以下が原因かと思います。
2.敵のゲームオブジェクト(当プログ上では”Ghost Brown”)にEnemyMove.csスクリプトがアタッチされていない。
敵のゲームオブジェクトにEnemyMove.csスクリプトをアタッチすれば表示されると思います。