Unity2021から標準パッケージとなった”Visual Scripting(ビジュアルスクリプティング)”(旧Bolt)を使用して、あるゲームオブジェクトがプレイヤー(ターゲット)を追いかけるようにしてみます。NavMeshを使います。
プレイヤーとしては以下を使います。
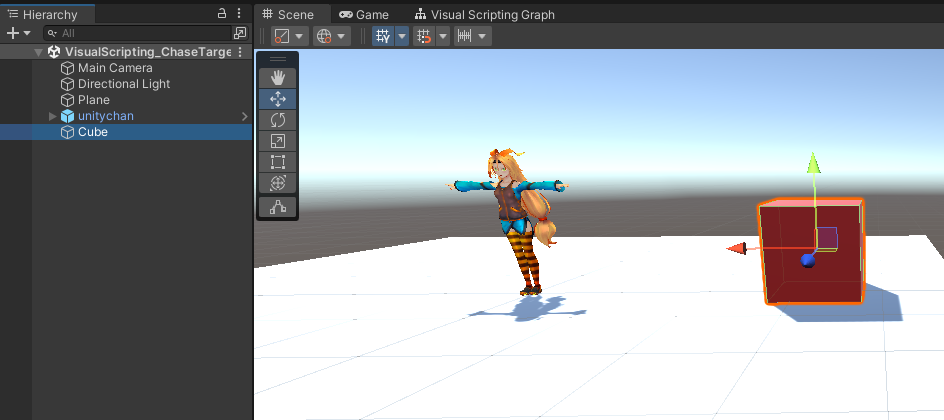
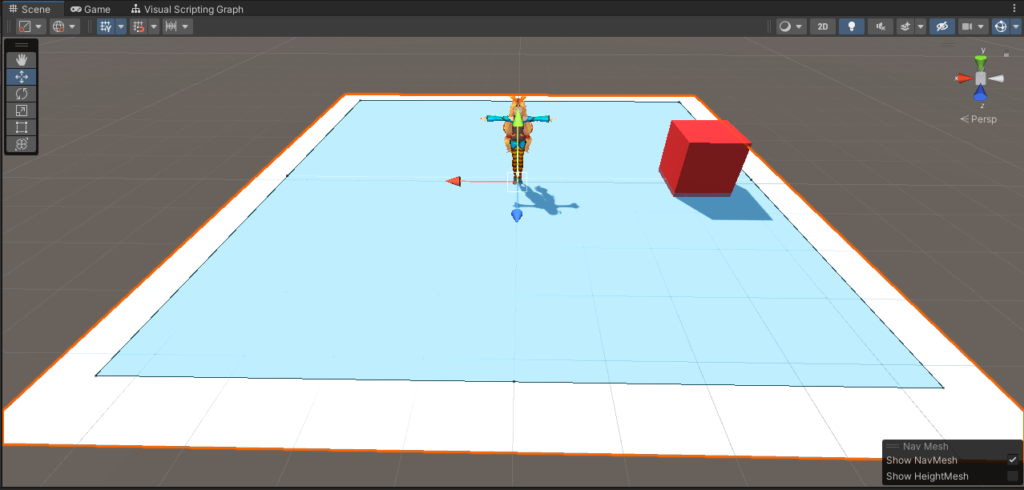
完成動作
ターゲット(unitychan)をCube(赤)が追いかけています。
作り方
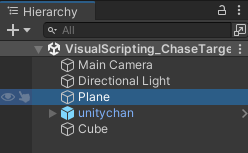
1.シーンに各オブジェクトを配置
1-1.以下のように配置する。床をPlane、プレイヤー(ターゲット)をunitychan、ターゲットを追いかけるゲームオブジェクトをCube(赤)とした。
2.NavMeshをベイクする
ターゲットを追いかけるゲームオブジェクト(今回はCube(赤))が動ける範囲をNavMeshで設定する。
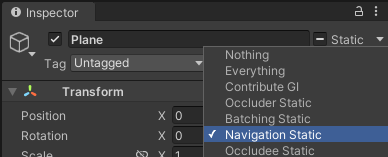
2-1.地形(移動可能にしたい場所)や障害物を”Navigation Static”にする(こうしないとあとの手順の”Bake”ボタンを押しても反応しない)
2-1-1.以下のように”Navigation Static”にしたいゲームオブジェクトをすべて選択。
2-1-2.Inspectorウィンドウの右上の”Static”の▼をクリックして、”Navigation Static”にする。
2-2.NavMeshをベイク
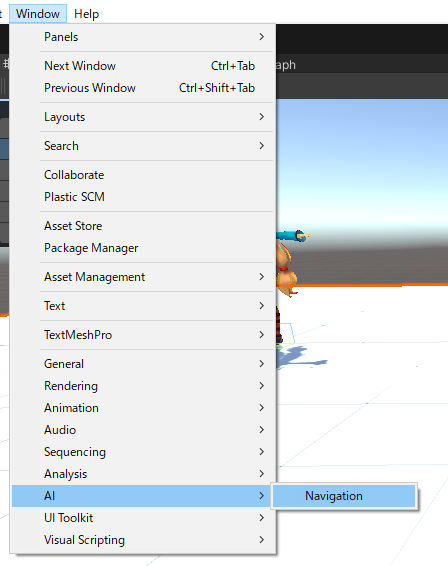
2-2-1.以下の場所のNavigationをクリックしてウィンドウを表示する。
2-2-2.Navigationウィンドウの「Bake」タブを選択する。
2-2-3.今回はデフォルトのまま右下のBakeボタンを押下
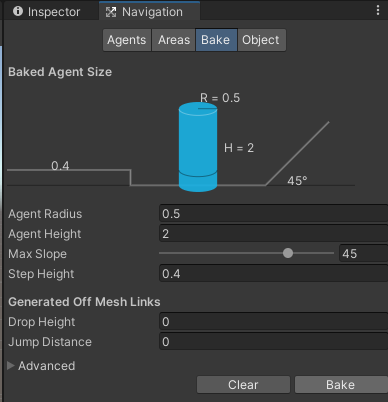
2-2-4.動ける範囲が青い枠で表示される。
3.ターゲットを追いかけるゲームオブジェクトにNavMeshAgentをアタッチ
NavMeshAgentをアタッチしたゲームオブジェクトは、NavMeshでBakeした範囲の中を移動しながらターゲットに行くようになる。
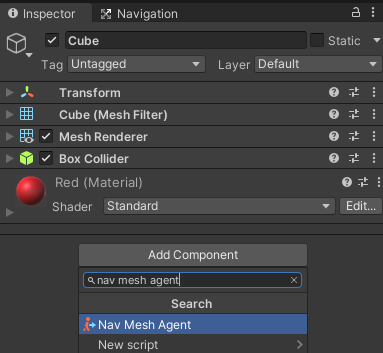
3-1.Cubeに”Nav Mesh Agent”コンポーネントを追加
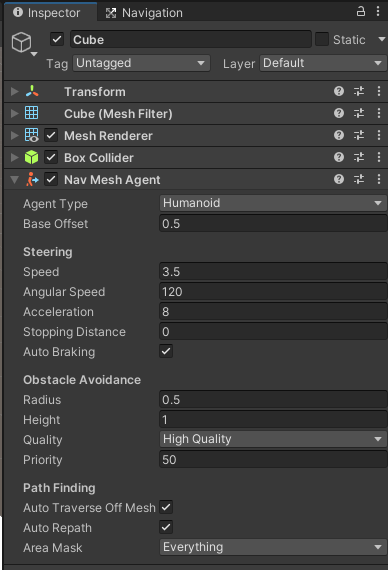
※“Nav Mesh Agent”の設定値を変えれば、移動速度や障害物回避精度を変えれるが今回はデフォルトのまま。
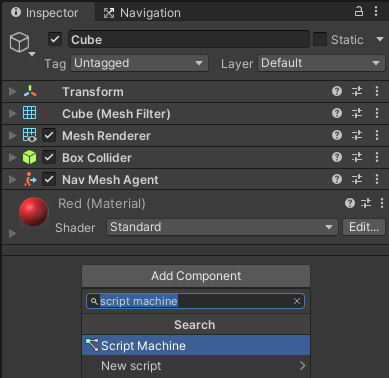
4.ターゲットを追いかけるビジュアルスクリプトを作成
4-1.Cubeに”Script Machine”コンポーネントを追加
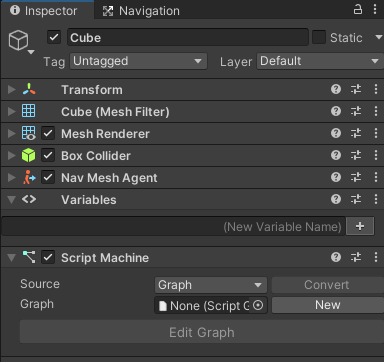
4-2.”Graph”プロパティの”New”ボタンを押下

4-3.ファイルの保存ダイアログが開かれるので任意の場所にChaseTargetという名前で保存する。
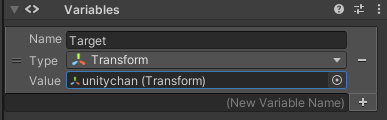
4-4.Cubeに以下のように変数(Variables)を作成。

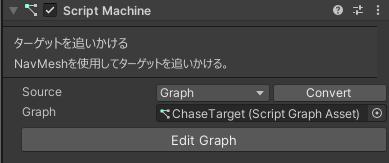
4-5.作成した”Target”変数のValueに”unitychan”をアタッチ

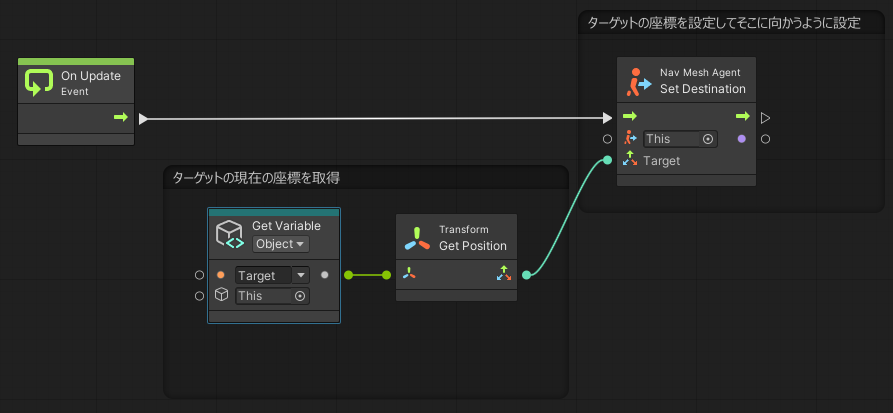
4-6.以下の画像の”Edit Graph”ボタンを押下して、以下のようにグラフを作成する。
5.(しなくてもよい)unitychanの設定
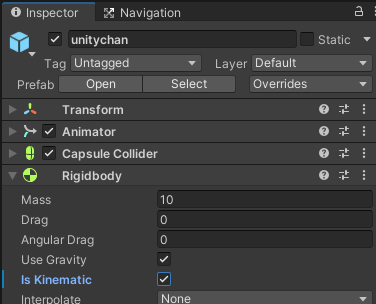
5-1.unitychanのRigidbodyの”Is Kinematic”にチェックを入れる。
これにチェックを入れない場合、unitychanがCubeに押し出されてしまう。
チェックを入れると、物理演算が無効になるので押し出されない。
実行
これで実行すると、ターゲット(unitychan)をCubeが追いかける。
コメント